
들어가기 😀
최근 IDEA도 변경을 하였고, 노트북도 바꾸는 바람에 요 근래 초기설정 블로그를 작성하고 있다.
개발 dbTool을 DBeaver를 사용하고 있는데, 이참에 초기 세팅하는 방법을 정리해 보자.
설치하기 😄

Download | DBeaver Community
Download DBeaver Community 24.2.4 Released on November 3rd 2024 (Milestones). It is free and open source (license). Also you can get it from the GitHub mirror. System requirements. DBeaver PRO 24.2 Released on September 9th, 2024 PRO version website: dbeav
dbeaver.io
위 사이트에 접속하여 OS에 알맞게 선택하여 설치한다.
설정하기 😉
1. 글꼴 변경
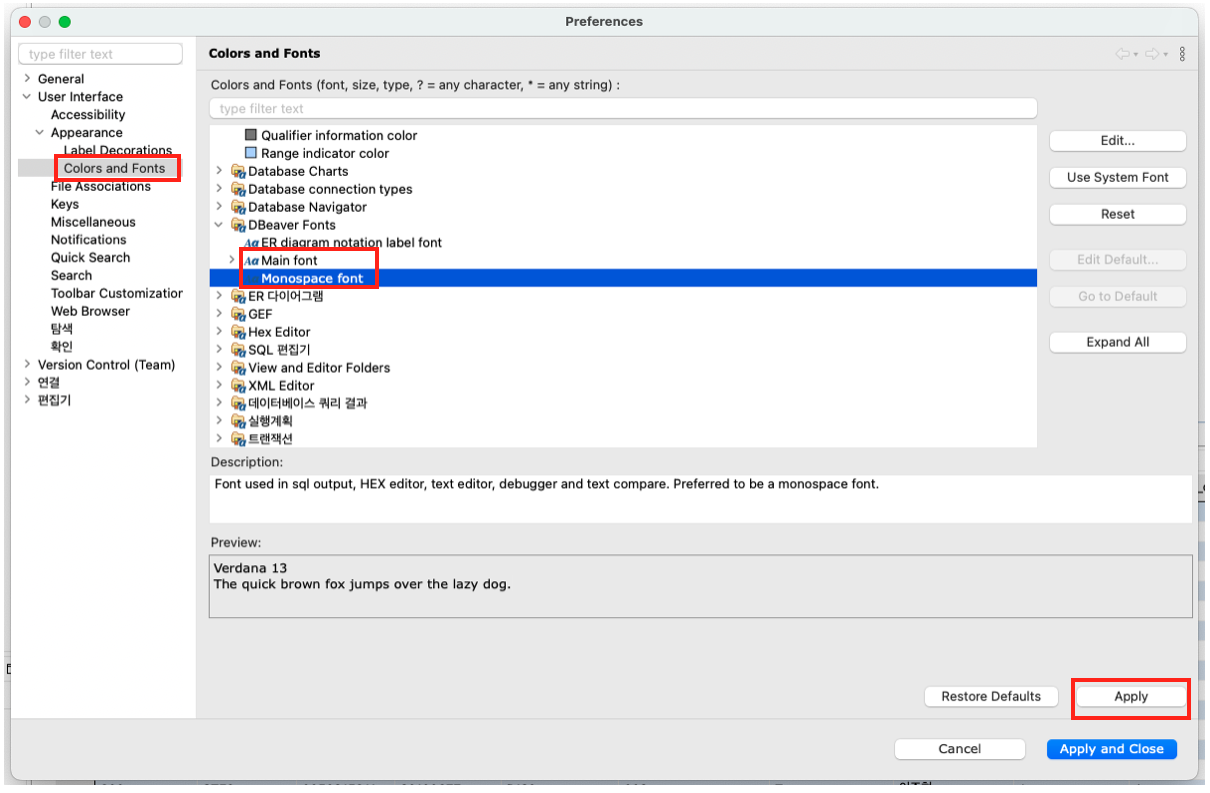
- 윈도우 > Preferences > User Interface > Appearance > Colors and Fonts > DBeaver Font > Main font or Monospace font
* Main font : 편집기, 폰트, 쿼리 결과 등 DBeaver 내에 따로 설정할 수 있는 것을 제외한 나머지.
* Monospace : edit 섹션의 폰트와 크기. 편집기 내의 폰트를 설정할 수 있음.
2. auto - commit 선택 및 해제

- 윈도우 > Preferences > 연결 > 연결유형 > Auto - commit by default 선택 및 해지
3. 라인 설정

- 윈도우 > Preferences > 편집기 > Text Editors > Show line numbers 체크
4. 개발 / 운영 스크립트 창 색깔 적용

- 윈도우 > Preferences > 연결 > 연결유형
* 각 property에 맞는 설정을 지정한다.

- 설정하고 싶은 Database 우클릭 > Edit Connection > General > Connection Type 수정
5. SQL키워드 대문자로 자동 포맷팅

- 윈도우 > Preferences > 편집기 > SQL 편집기 > SQL 포맷 > Keyword case → Upper로 변경
'Setting' 카테고리의 다른 글
| [DBeaver] Heap 메모리 늘리기 (0) | 2025.01.08 |
|---|---|
| [h2] MAC에서 h2 DB 설치하기 (5) | 2024.11.13 |
| [Intellij] Apache Tomcat 추가 (4) | 2024.11.08 |
| [Intellij] 인텔리제이에 Google Code Convention 설정하기 (2) | 2024.11.04 |
| JetBrain ToolBox 이용하여 Intellij 설치 (5) | 2024.10.28 |